How to Do Lineart and Flats in Photoshopaka. "Something to do if you have a spare five hours"
All righty. I thought this would be a good tutorial for this forum since it seems a lot more people have Photoshop than I thought, and a few people have expressed interest in me doing another tutorial. More importantly, though, up until I start shading my pictures in Photoshop, I do not use my tablet, save for small, miniscule details. Which means you can all do this with a mouse! Yaaay! So, without further ado, here's how to do lineart and flats in Photoshop.
Table of Contentsss~
- Post 1: Intro and Terminology, Preparation
- Post 2: Lineart: The Line Tool
- Post 3: Lineart: The Pen Tool
- Post 4: Flats
Note: I wrote this with someone who's had very little experience in Photoshop in mind, so it may seem a little repetative or simple if you're someone who's used to working in Photoshop. This isn't because I think you're stupid, I'm just trying to make it as easy as possible for people who aren't familiar with the program. Plus I like to hear myself talk when it comes to things I like. xD Ahaha. But in the end, I'd rather supply a little bit too much information than not enough.
TERMINOLOGY- Lineart - Art consisting of black lines. Umm, I guess this is just my term for it, but I've also heard it frequently referred to as "inks" or an "inked picture."
- Flats - Lineart with basic colors filled in. Flat colors lack any highlight or shadow, which makes the picture look, well, flat.
Now that we've translated the artist-technobabble-jargon...
PREPARATIONFor creating lineart, there are generally two tools you can use: the pen tool, and the line tool. Both work by creating imaginary "paths" which Photoshop can later trace with a brush of your choice. The pen tool is best suited for making curves, and the line tool for straight lines. I personally use the pen tool almost exclusively since it creates a much smoother-looking image, but I used the pencil tool a lot when I began inking my pictures in Photoshop (mostly because I couldn't figure out how to use the pen tool very well to save my life!).
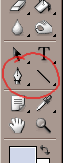
The pen tool and line tool are about halfway down the tool palette. There are a lot of options for each tool, so make sure you have the right one selected (the icons should match with the picture below). You can change versions of your tool by right-clicking on the icon and selecting the one you want.
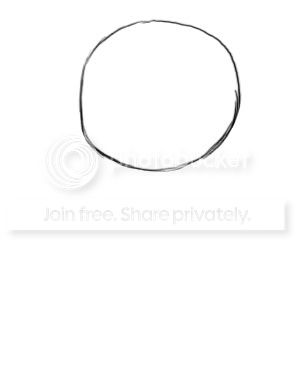
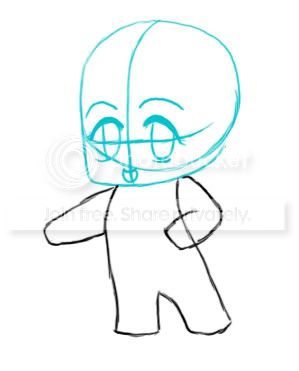
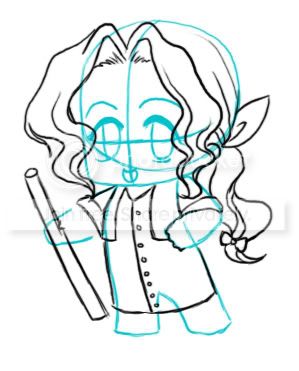
You'll also need a sketch to start off with - I've got one of Amethyst from Crystallia here (
shamelesssiteplugomg). ^^ Ain't she cute? To get your sketch ready for inking, open it in Photoshop.

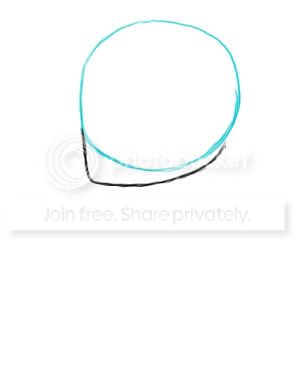
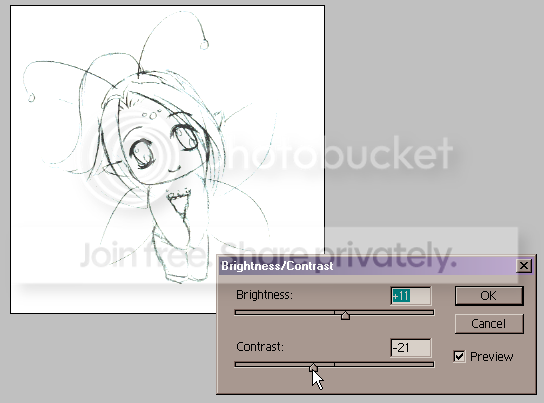
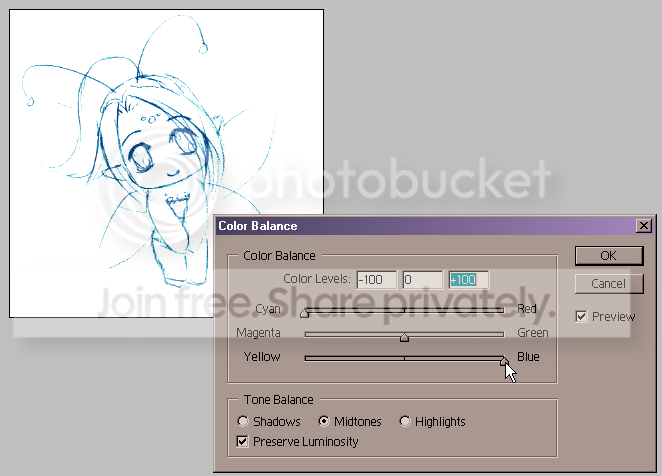
I like to change the color of the sketch so I can tell the difference between the sketch and the lines I'm putting down. To do that, simply go to Image > Adjustments > Brightness/Contrast and make the sketch a little lighter than normal. Then go to Image > Adjustments > Color Balance and play around with the colors until you find a tint you like.
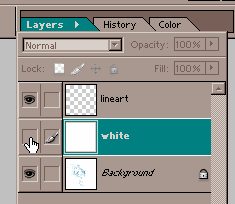
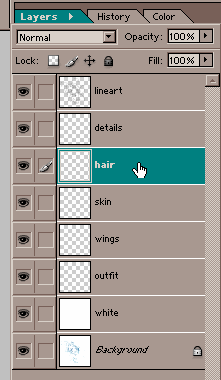
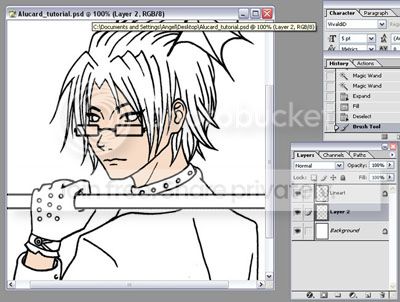
With that done, press Ctrl + Shift + N to create a new layer. Name it something. (May I suggest "lineart"?) This will be your lineart layer -
make absolutely sure you have it selected before you start inking. I've started inking a picture only to find I was on the sketch layer too many times to count, and it's very, very frustrating to have to start over again.
Additionally, I like to add a third layer in between the sketch and the lineart layers named "white" or "bg" or something similar. I completely fill it with white and then toggle its visibility off (the little eye next to its name on the layer palette). When I want to see what my lines look like without the sketch underneath, I just toggle the visibility for the "white" layer on, and I can see what it looks like right away. Pretty nifty, huh?
Also! You'll want to familiarize yourself with many of Photoshop's shortcuts. Here are a few that are particularly useful:
- Ctrl + Z - Undo. This only undoes the last step you took and then redoes it again, depending on how many times you press Ctrl + Z. To undo multiple moves, you have to go to the History window (Window > History) and change it there.
- P - Changes your active tool to the pen tool.
- U - Changes your active tool to the line tool.
- B - Changes your active tool to the brush tool.
- G - Changes your active tool to the paint bucket/gradient tool.
- W - changes your active tool to the magic wand tool.
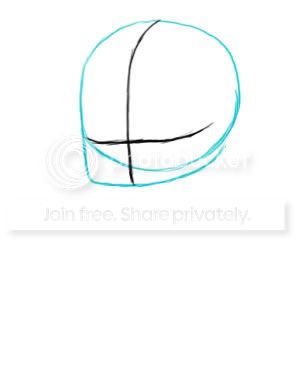
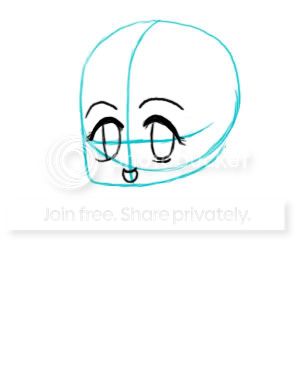
LINEART: THE LINE TOOLFirst off, we'll cover the line tool. I find it convenient to work with the line tool in paths, which means I'll have the "paths" icon selected at the top of the screen. You can also change your line width here - I'd recommend staying at 3 pixels or below though, otherwise your lines end up looking very sharp and blocky, and it looks like you just kind of traced the general shape of your picture using a ruler.

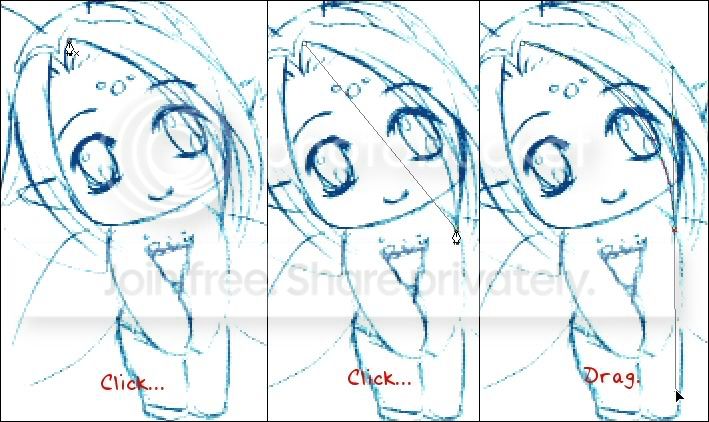
Using the line tool is pretty easy - just click in the spot you want your line to start, hold it, then drag to the spot where you want your line to end and release your mouse. Be sure to use lots of little lines when tracing around curves, otherwise it'll look choppy. Note that the line tool is not adding any actual colors to your picture yet - it's simply creating transparent paths that will be of use to you later.
Now, let's say you've traced a pretty good portion of your picture and you're tired of looking at all those paths. Right click on your picture, select "Fill Path" and click OK on the box that pops up to fill all those paths you made before. However, those icky path outlines are still there, and you don't need them anymore... Press P to switch to the pen tool, right click on the picture again, and select "Delete Path" to get rid of it. (For some reason, the menu that pops up when you right click with the line tool doesn't have a "Delete Paths" option... which is why we're switching over to the pen tool for a bit.) Then switch back to the line tool and continue inking your picture until it's done!
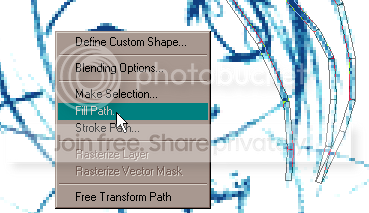
Filling paths.
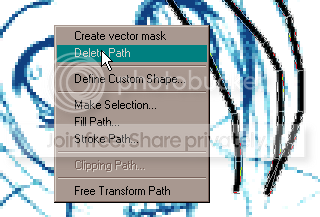
Deleting them.
The resulting lines.
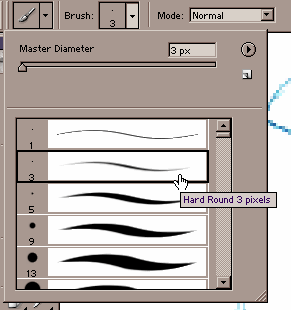
LINEART: THE PEN TOOLThis is personally my favorite tool to use when making lineart, but it can be pretty confusing for someone who's using it for the first time. The pen tool works by creating points you "anchor" your curves around - called, surprisingly enough, anchor points. It's also much more versatile than the line tool and can pretty much replace it once you have enough experience, which is also pretty cool. Inking with the pen tool relies a lot on the brush tool, since what Photoshop does to trace along paths created by the pen tool is to grab whatever the brush tool is set on and trace along the paths with that. I recommend you have your brush tool's width set on about 2 pixels for most lines, but you can vary it as you see fit.
The Pen tool options bar is nothing new - here's what it looks like.

The options bar you should be concerned with is the brush tool options bar, which looks like this. :3 Use the drop-down menu to change brush size and shape - remember that this determines what you're going to be tracing your paths with!

To use the pen tool, click on where you want to begin the line. Then click elsewhere on the picture to create another anchor point, but don't let go of your mouse! Drag the mouse arrow away from your second anchor point, and you'll see a curve begin to form. Have some fun with it and see how where you move your mouse affects the shape of the curve. Let go of the mouse when you're satisfied with the curve you've made.
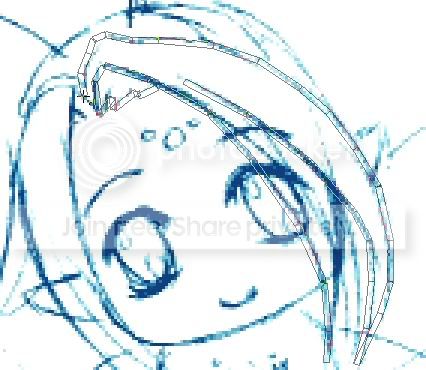
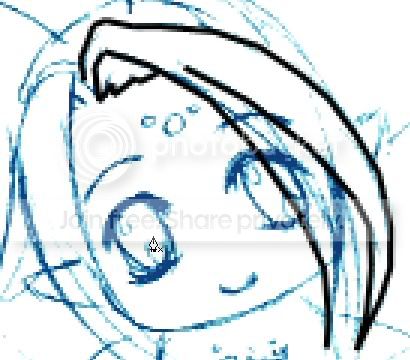
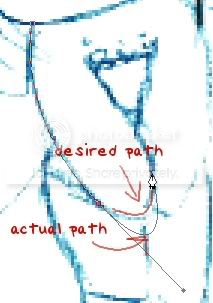
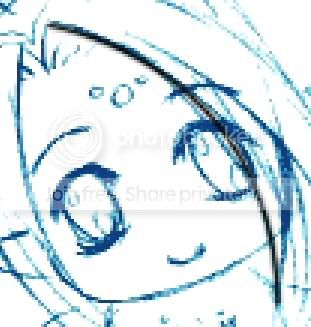
Deciding where you put your anchor points is the tricky part. The biggest mistake when I first began using the pen tool is that I tried treating it like the pencil tool, and ended up with waaay too many anchor points than was necessary. Another difficulty in using the pen tool is knowing when to begin a new set of curves. How you drew the previous curve in your series will affect the next curve - so if you have a big, long curve first and then a tiny little curve after that, the pen tool has a tendency to overshoot its bounds and not follow the lines you want it to. (I know it sounds confusing, but take a look at the picture below and see if you can't figure out what I mean.)
When this happens, or you just want to end your curve in general, you need to trace over your existing paths and delete them, then start anew. To do this, right click on the picture and select "Stroke Path" (NOT "Fill Path" like with the line tool... this produces some pretty funky stuff when you're dealing with the pen tool).
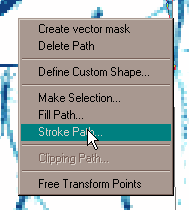
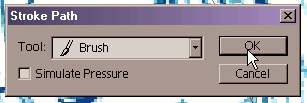
A little box then pops up. Make sure that you have the brush tool selected in the little drop-down menu that appears. Generally you want to make sure the "Simulate Pressure" box is unchecked, because that makes the end of your lines fade out, and right now you want to make nice, solid-looking lines that create a definite, enclosed area. Having closed areas of space is especially important if you want to lay down flats - read the next section to find out why. Delete your path by right-clicking and selecting "Delete Path" from the menu, and continue inking.
You'll be tracing and deleting your paths a lot more often with the pen tool than with the line tool, which can get tedious at times. But overall, I'd say that it's definitely worth it. The pen tool creates a much better-looking image than the line tool can.
FLATSAll righty, now that you've got a nice, finished piece of lineart, you can do one of two things: toggle the visibility of the "white" layer on and keep it that way, or select your sketch layer and go to Edit > Fill to fill up that layer with white. Now you've deleted/covered up your sketch, and all you have left is that nice lineart you made before.

Now, create a new layer (Ctrl + Shift + N) and place it underneath your lineart layer. You're going to start putting your flats on this layer - you can make more if you want. I generally used at least 5 or 6 different color layers when working with my pictures. Just make sure they're all below your lineart layer and above your white/background layer.
Now we're going to be using the magic wand tool! Press W to switch to it. Yaay! To make sure it's set up properly, be sure that all three boxes are checked on the tool options bar, like so:

Now, with your color layer selected, begin selecting areas of the picture that you want to color. This is why you need solid lines with enclosed areas, otherwise the selection will leak out into places that you don't want it to! It's essentially a lot like the paint bucket in MSPaint. You need to hold the shift key while selecting multiple areas, or it will replace your old selection with your new one instead of adding it to the old area. Keep in mind the selected area will not look perfect - the areas you've selected will not go all the way to the lines you've made. But it doesn't have to look perfect. We'll fix that.
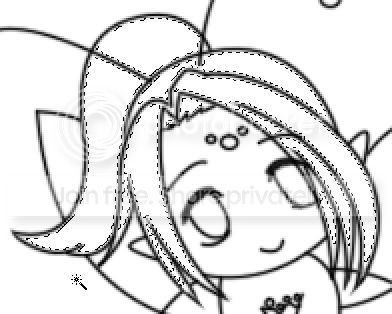
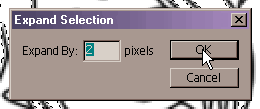
Once you're done selecting the areas that will be a certain color, we'll expand the selection space so that it will actually touch the lines you made. Go to Select > Modify > Expand. Generally, you'll want to expand your selection by 2 pixels, because usually 1 isn't enough and 3 is often too much.

With that done, press G to switch to the gradient/paint bucket tool and fill your space. The gradient tool works by clicking a point on your picture, dragging it out to form a line to indicate the direction of your gradient, and releasing. You can experiment and see how that affects the gradient that's laid down. The other option is the paint bucket tool, which is pretty much just a fancy, souped-up version of the MSPaint tool by the same name.

Press Ctrl + D to defloat your selection. Notice that there are still some areas that didn't get selected, so you're going to have to go in and color them by hand with the brush tool. But overall, you won't have to do too much of that, and you can lay down your flat colors relatively quickly.

Then you can lock each layer's transparency and continue on to shading them, or just keep the image the way it is... but that's enough for one tutorial.

The finished piece.


 - chibi (pronounced chee-bee)